CMS Rive Integration
Rive is a powerful tool for creating interactive animations, enabling designers and developers to bring motion to their projects. However, Webflow CMS doesn't natively support Rive animations.
Don't worry, we have a simple workaround that allows you to seamlessly integrate and control Rive animations in your Webflow project. Keep reading to learn how!
Get started
Follow the simple steps below.
1. Installation
Add the Rive scripts to the body page and initialize the animation with the following code
                    <script src="https://unpkg.com/@rive-app/canvas@latest"></script>

                    <script src="https://cdn.jsdelivr.net/gh/kuzoki/webflow-helpers@main/kuzo-rive.js"></script>
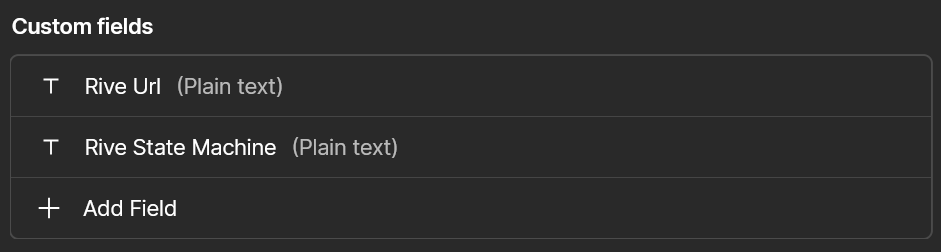
2. Set Up Your CMS in Webflow
1. Create a new CMS collection if not created
2. Add two 'Text' fields:
One to store the URL of your Rive file and another for the Rive state machine name
Example
3. Host Your Rive File:
Upload your .riv file to Webflow or an external hosting service such as Firebase, GitHub, or a CDN. If uploaded to Webflow Obtain the URL of the Rive file by right-clicking on the file and selecting "Copy link". You will get a URL similar to the following:
https://cdn.prod.website-files.com/674f11f.../67b4a.....-bubble-gum-boy.riv
Example

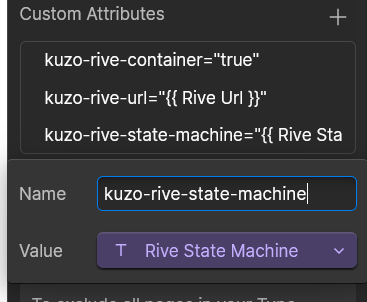
3. Set Up the Front-End in Webflow
1. Add a Div Block to act as a container for the Rive animation. Then, assign the following attributes to the div:
- kuzo-rive-container - Identifies the div as the container (value should be true).
- kuzo-rive-url - Specifies the URL of the Rive file.
- kuzo-rive-state-machine - Specifies the state machine for the animation.
Example
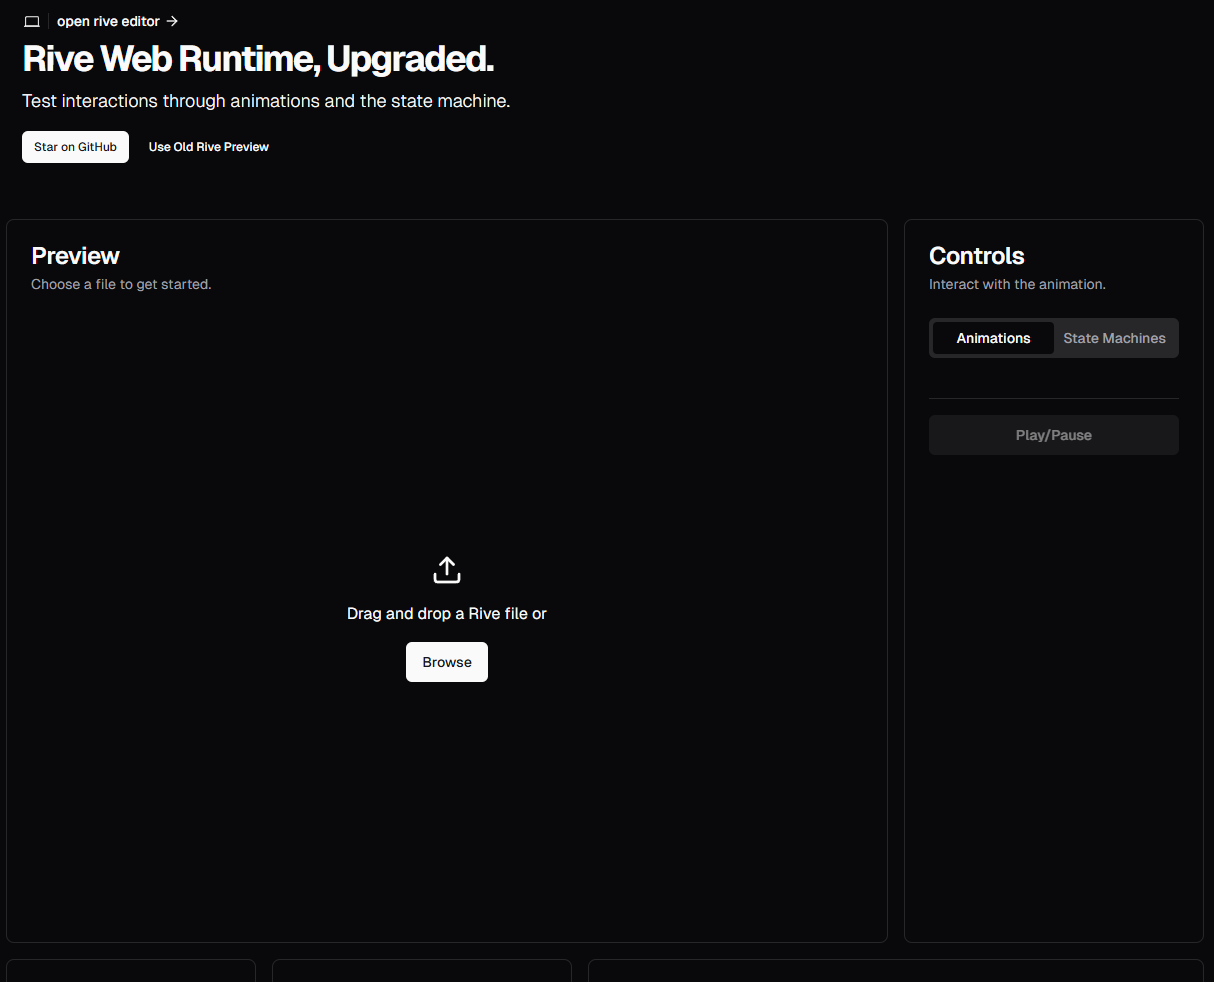
Need help finding the state machine name?
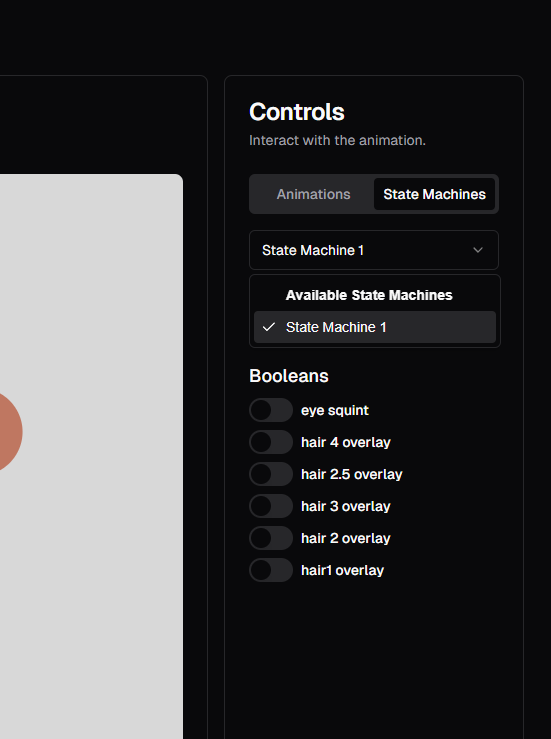
To find the state machine name, follow these steps:
- You can use this Rive tool to explore the state machine in your file. Rive tool.
- Upload Your Rive file to the tool and explore the state machine name.
- Go to the controls and click on the state machines.
- A dropdown will appear, select the state machine name from the list.
- Use the exact name as it appears in the dropdown. In our case, we will use State Machine 1.
3. Optionally Step to adjust canvas width
Add a class to the divBlock to style it and adjust the canvas dimensions. Include the following CSS in the head tag for custom code in Webflow.
                    <style>

                      .your-div-block-class canvas {

                        width: 100%;

                        height: 100%;

                      }

                    </style>
Final Step
Congratulations! You have successfully integrated the Rive animation into your Webflow project. If you have any questions or need further assistance, feel free to reach out to us.
Happy designing!
More custom Webflow scripts
Check out these other power-ups to enhance your Webflow website.
Richtext images zoom
Add a zoom functionality to images in your Webflow CMS richtext fields.
Learn more